 Save
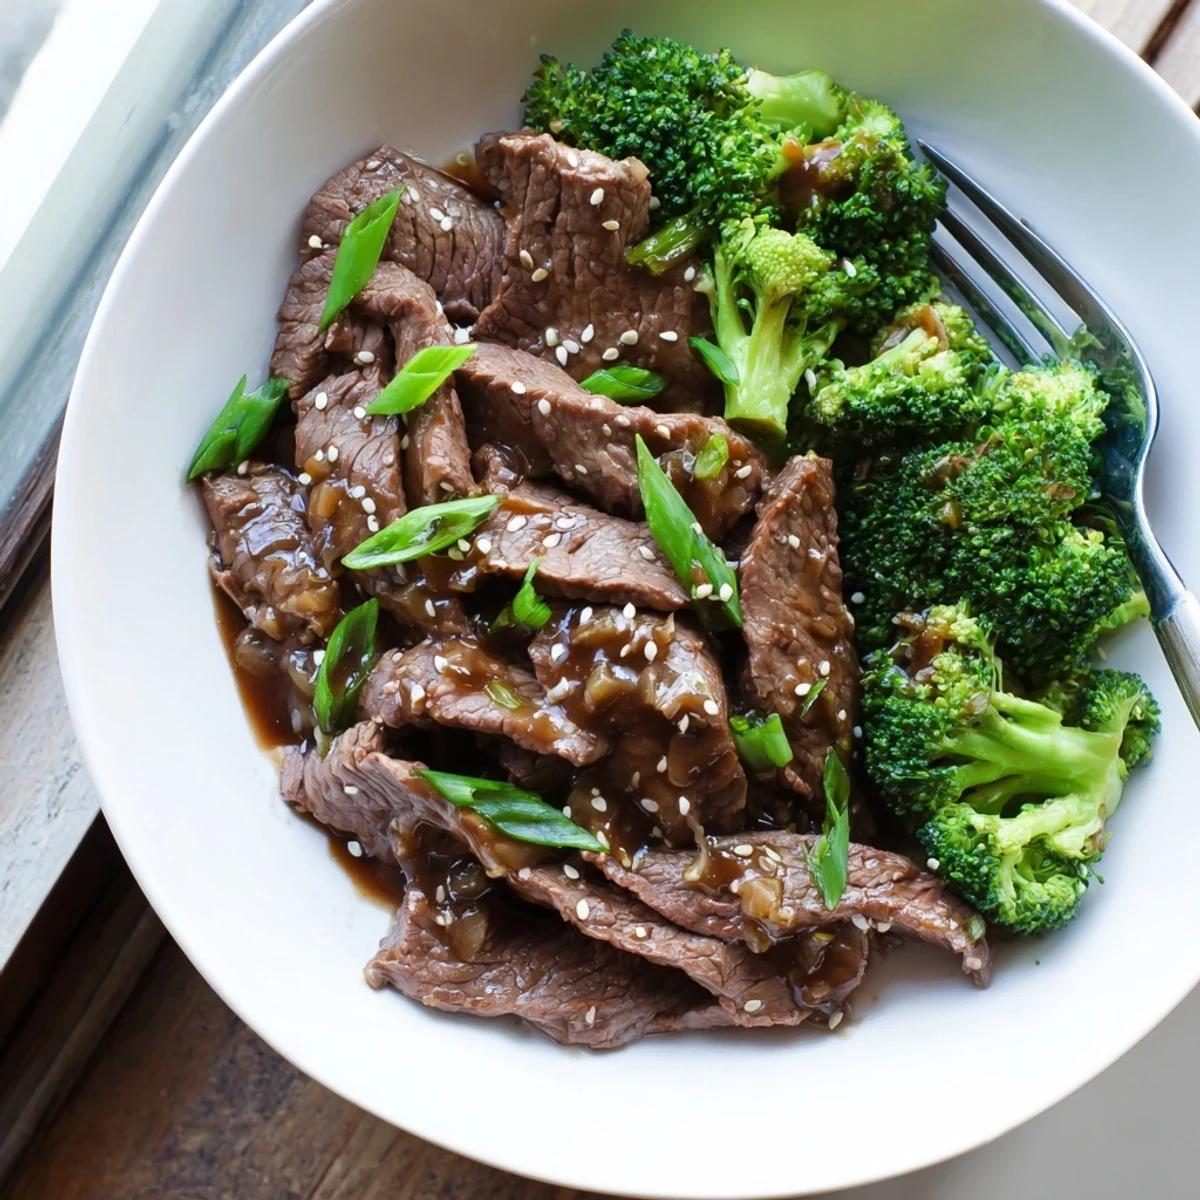
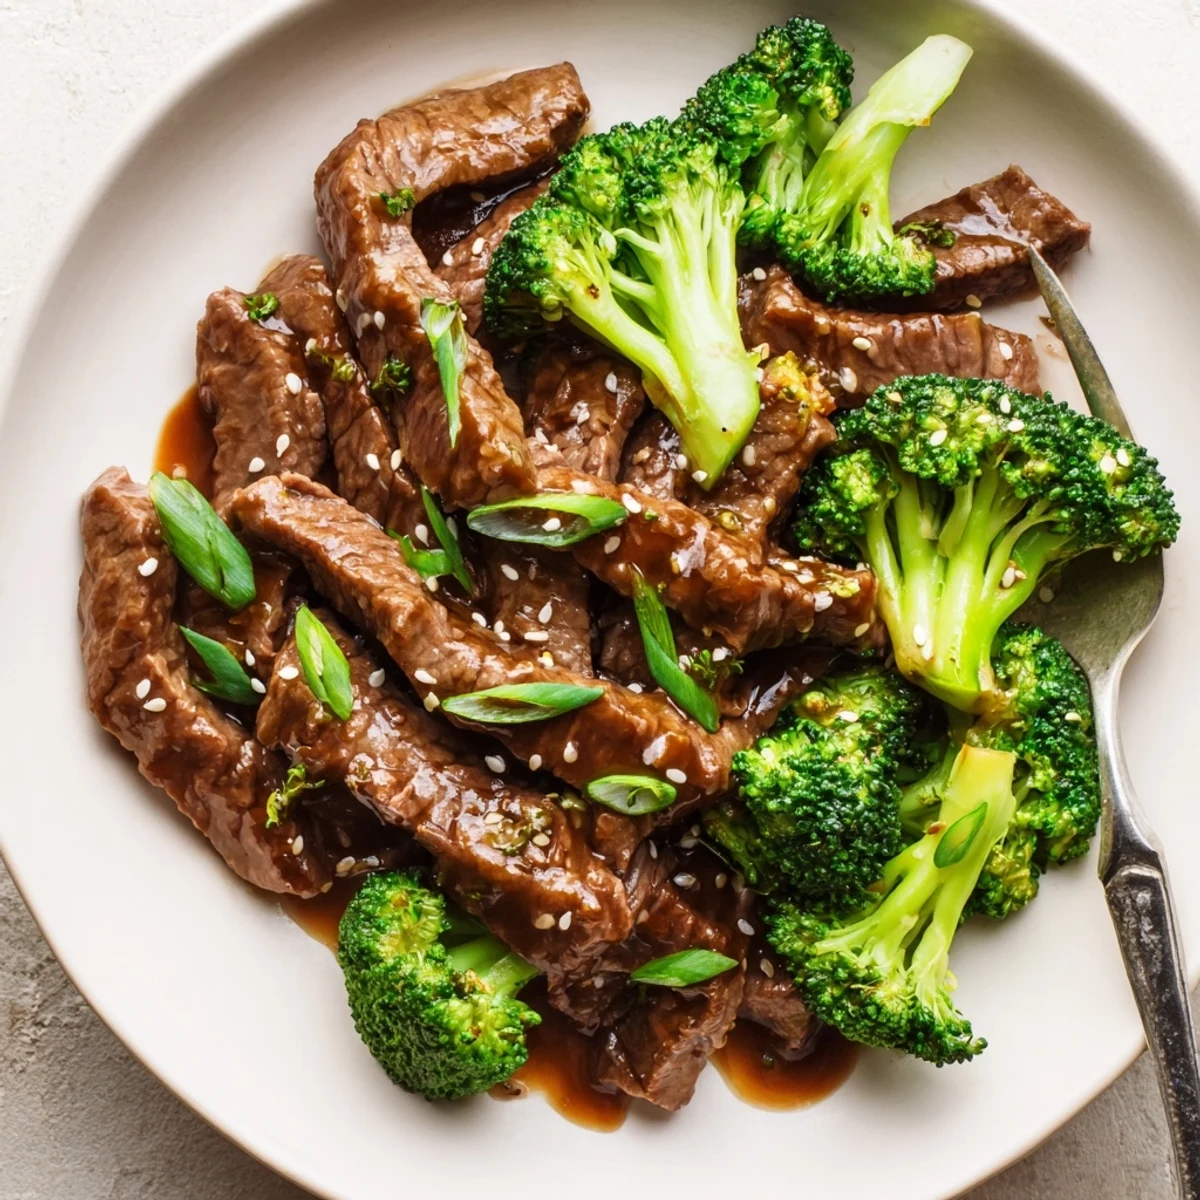
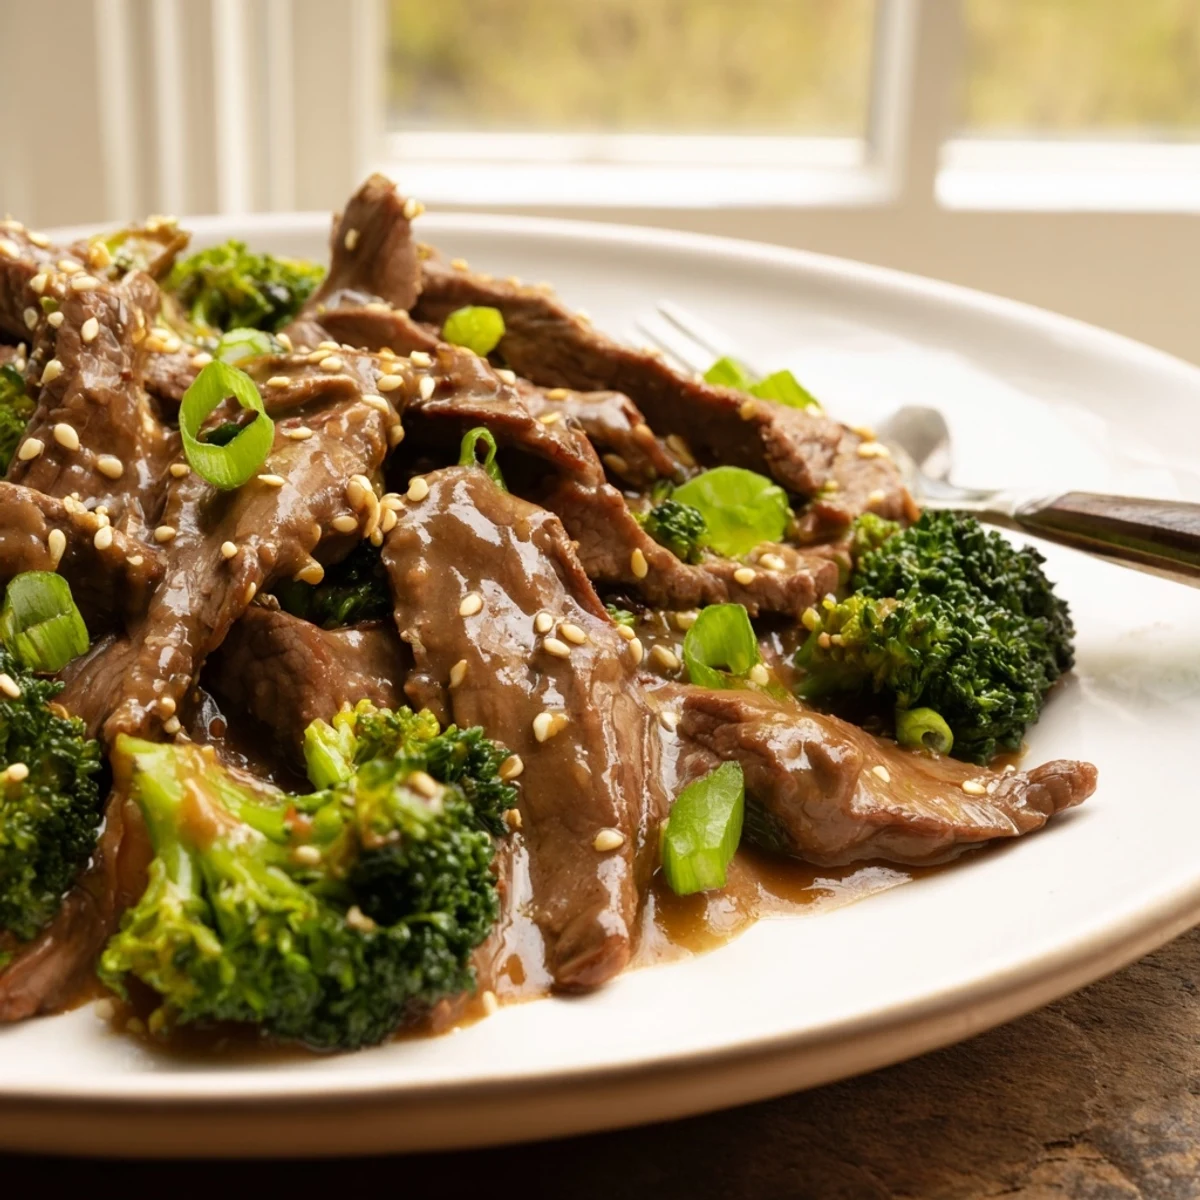
Save This dish combines tender strips of flank steak with crisp-tender broccoli florets, all coated in a rich sauce that balances savory soy sauce with sweet brown sugar and aromatic ginger and garlic. The Instant Pot pressure cooking method infuses the beef with deep flavor while keeping it moist, then steams the broccoli to perfect tenderness. A final cornstarch slurry thickens the sauce to a glossy consistency that clings beautifully to every bite. Ready in just 35 minutes from start to finish, this dairy-free main serves four generously and pairs perfectly with steamed rice or noodles.
The first time I made beef and broccoli in my Instant Pot, I stood there watching the steam release like it was some kind of magic trick. My roommate leaned against the doorframe, arms crossed, absolutely convinced I had forgotten to turn on the stove. When I lifted that lid and the smell of ginger and sesame oil hit us both, her skepticism vanished completely. We ate straight from the pot with forks, standing in the kitchen, not even bothering with plates.
Last winter my sister came over after a terrible day at work, the kind where everything goes wrong before 9 AM. I texted her that beef and broccoli was happening, and somehow she made it to my apartment in record time. We sat on the couch with our bowls, watching a terrible movie neither of us was paying attention to, while she vented about her boss. By the time she reached the bottom of her bowl, she actually laughed about something that had made her cry earlier that morning.
Ingredients
- 1.5 lbs flank steak or sirloin, thinly sliced against the grain: Flank steak has incredible flavor and becomes meltingly tender in the Instant Pot, though sirloin works beautifully if that is what you can find. Slice it thinly against the grain, which shortens the muscle fibers and makes every bite fork-tender instead of chewy.
- 1 tablespoon cornstarch for coating: This initial coating protects the beef proteins as it cooks, keeping the meat silky and preventing it from becoming tough during pressure cooking.
- 1/2 cup low-sodium soy sauce: Low-sodium soy sauce lets you control the salt level while still building that deep, savory foundation that makes Asian-inspired dishes so craveable. If you only have regular soy sauce, taste the sauce before adding any additional salt.
- 1/2 cup beef broth: The broth adds depth and body to the sauce, creating that luxurious texture that clings beautifully to both beef and broccoli.
- 1/4 cup brown sugar: Brown sugar brings a subtle mol sweetness that balances the salty soy sauce and creates that glossy, caramelized finish you get from takeout. White sugar works in a pinch, but brown gives the sauce more complexity.
- 1 tablespoon sesame oil: A little goes a long way here, sesame oil adds that unmistakable nutty aroma that makes your kitchen smell like an amazing restaurant. Add it to the sauce mixture rather than using it for cooking, which preserves its delicate flavor.
- 3 cloves garlic, minced: Fresh garlic, not the jarred stuff, makes a noticeable difference here. The pressure cooking mellow the garlic, so you can be generous without worrying about it being too sharp.
- 1 tablespoon fresh ginger, minced: Peel it with a spoon instead of a knife to avoid wasting the aromatic flesh underneath the skin. Fresh ginger brings a bright, spicy warmth that cannot be replicated by ground ginger.
- 1 tablespoon rice vinegar: This adds just enough acid to cut through the richness and brighten the entire dish. Apple cider vinegar makes a decent substitute if you are in a pinch.
- 1/2 teaspoon crushed red pepper flakes: Adjust this based on your heat tolerance, but remember that pressure cooking does mellow spicy notes. You can always add more at the end if you want more kick.
- 4 cups broccoli florets: Fresh broccoli holds up better during that second pressure cook, but frozen works if that is what you have. Cut them into uniform pieces so they cook evenly and you get that perfect tender-crisp texture.
- 2 tablespoons cornstarch with 2 tablespoons cold water: This slurry transforms the thin cooking liquid into that glossy, restaurant-style sauce that coats everything beautifully. Mix it right before adding it to the pot, because cornstarch settles quickly.
- Sesame seeds and green onions for garnish: These are not just pretty, they add fresh texture and a pop of color that makes the dish look as good as it tastes. Toast the sesame seeds in a dry pan for 2 minutes first to unlock their nutty flavor.
Instructions
- Coat the beef:
- Place your sliced beef in a large bowl or directly in the Instant Pot insert, then sprinkle with 1 tablespoon cornstarch. Toss everything together with your hands until every piece of beef has a light, dusty coating, which will protect the meat and keep it incredibly tender.
- Whisk the sauce:
- In a medium bowl, combine the soy sauce, beef broth, brown sugar, sesame oil, garlic, ginger, rice vinegar, and red pepper flakes. Whisk until the brown sugar has completely dissolved and the mixture smells amazing.
- Combine and pressure cook:
- Add the coated beef to the Instant Pot if you have not already, then pour the sauce mixture over the top. Stir everything together, seal the lid, and make sure the valve is set to Sealing before cooking on high pressure for 10 minutes.
- Add the broccoli:
- Quick release the pressure when the timer beeps, open the lid, and add those broccoli florets right into the bubbling sauce. Reseal the lid and cook on high pressure for just 1 more minute, then quick release again immediately.
- Thicken the sauce:
- While the broccoli is cooking, mix the remaining cornstarch with cold water in a small bowl until smooth. Turn the Instant Pot to Sauté mode, stir in the slurry, and cook for 2 to 3 minutes while stirring constantly until the sauce thickens and coats the back of a spoon.
- Serve it up:
- Scoop everything over steamed rice, then top with those toasted sesame seeds and fresh green onions. The sauce will continue to thicken as it stands, so do not panic if it looks a little thin at first.
 Save
Save This recipe became my go-to for new parents because it is so fast and freezes beautifully. My friend Sarah would text me from the hospital parking lot after having her second baby, and I would have a container waiting for her when she got home. She told me later that she would eat it cold at 3 AM during those exhausting newborn nights, and it was still better than anything she could order.
Getting The Beef Just Right
Freeze your flank steak for 20 minutes before slicing, and you will get those paper-thin, restaurant-perfect cuts without any struggle. The slight firmness makes the knife glide through instead of sawing and tearing at the meat. I learned this trick after years of struggling with squishy, room-temperature beef that refused to cooperate with my knife.
Making It Your Own
Sometimes I throw in sliced bell peppers or snap peas during that second pressure cook, which adds beautiful color and stretches the servings even further. Once I added baby corn and water chestnuts because I was feeling ambitious, and my husband said it was better than the version from our favorite takeout place. Do not be afraid to use whatever vegetables you have in the crisper drawer.
Serving Suggestions That Work
Steamed jasmine rice is classic, but cauliflower rice works surprisingly well if you are watching your carbs. I have served this over ramen noodles, udon, and even zucchini noodles when I was trying to be healthy. The sauce is so flavorful that it makes anything taste amazing.
- Cook your rice in chicken or beef broth instead of water for extra flavor
- Set out Sriracha or chili garlic oil at the table so everyone can adjust their own heat level
- Cut the broccoli into smaller florets if you are serving this to kids who might turn their noses up at big pieces
 Save
Save This is the kind of meal that makes people think you spent all day cooking, even though it comes together in about 30 minutes. Sometimes the best recipes are the ones that give you more than they ask for.
Common Questions
- → What cut of beef works best?
-
Flank steak or sirloin are ideal choices because they're lean and absorb flavors well. Slice thinly against the grain for maximum tenderness.
- → Can I use frozen broccoli?
-
Yes, frozen broccoli florets work perfectly. Add them during the second pressure cooking step as directed, no thawing required.
- → How can I make this gluten-free?
-
Substitute tamari or coconut aminos for the soy sauce. Verify all other ingredients are certified gluten-free.
- → Is this spicy?
-
The red pepper flakes add mild heat. Omit them entirely if you prefer no spice, or increase to 1 teaspoon for more kick.
- → What should I serve with this?
-
Steamed white or brown rice soaks up the sauce beautifully. Noodles, quinoa, or cauliflower rice also work well.
- → Can I make this ahead?
-
The flavors actually improve overnight. Store in an airtight container and reheat gently with a splash of water or broth.