 Save
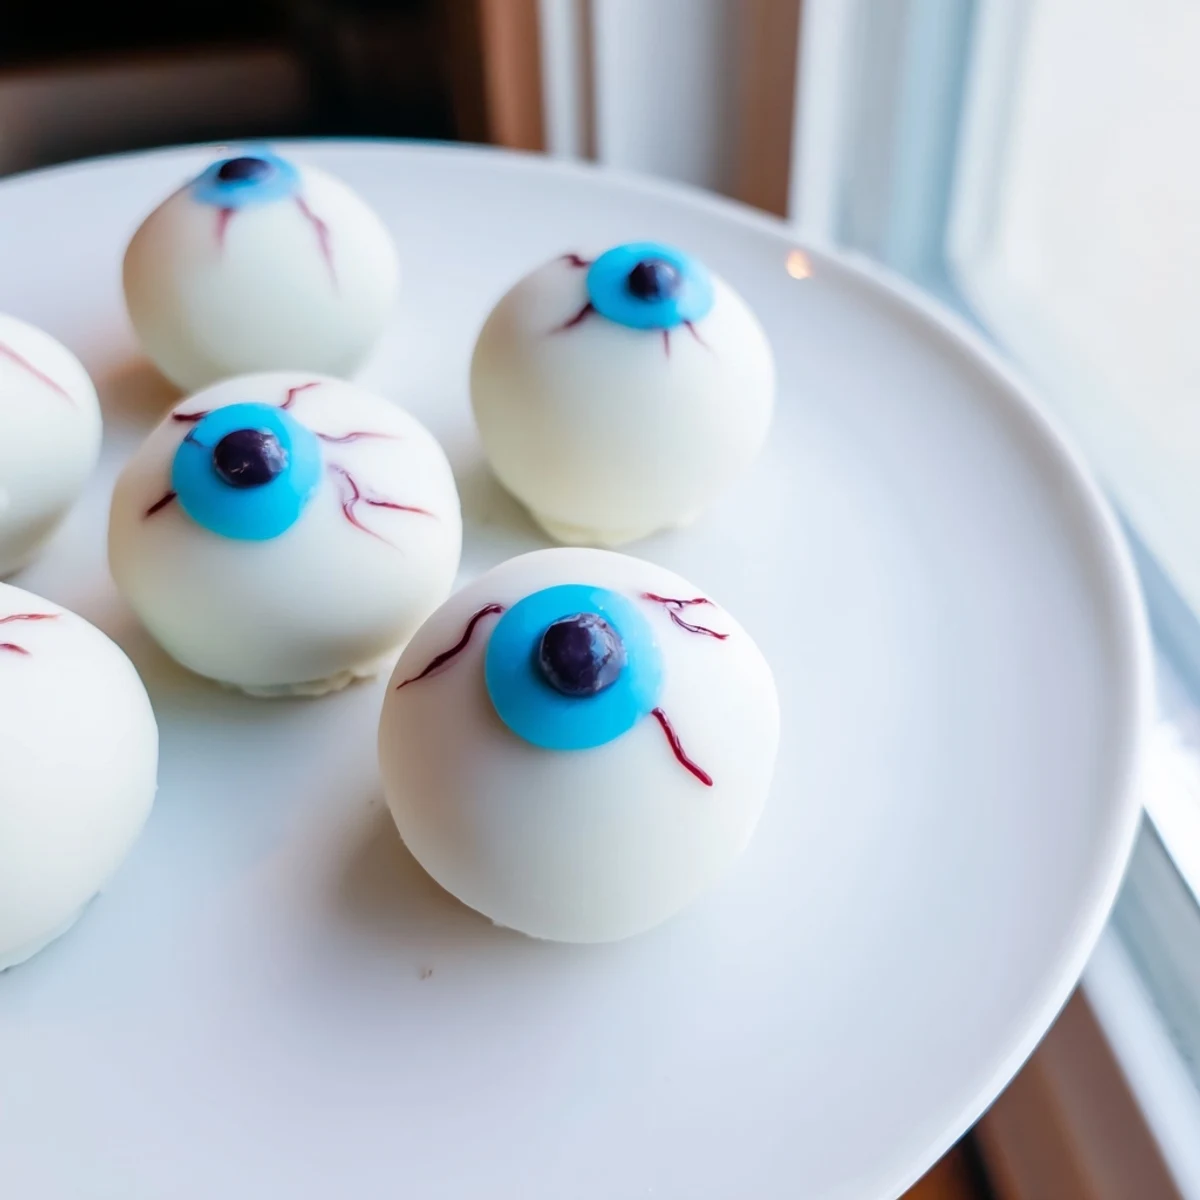
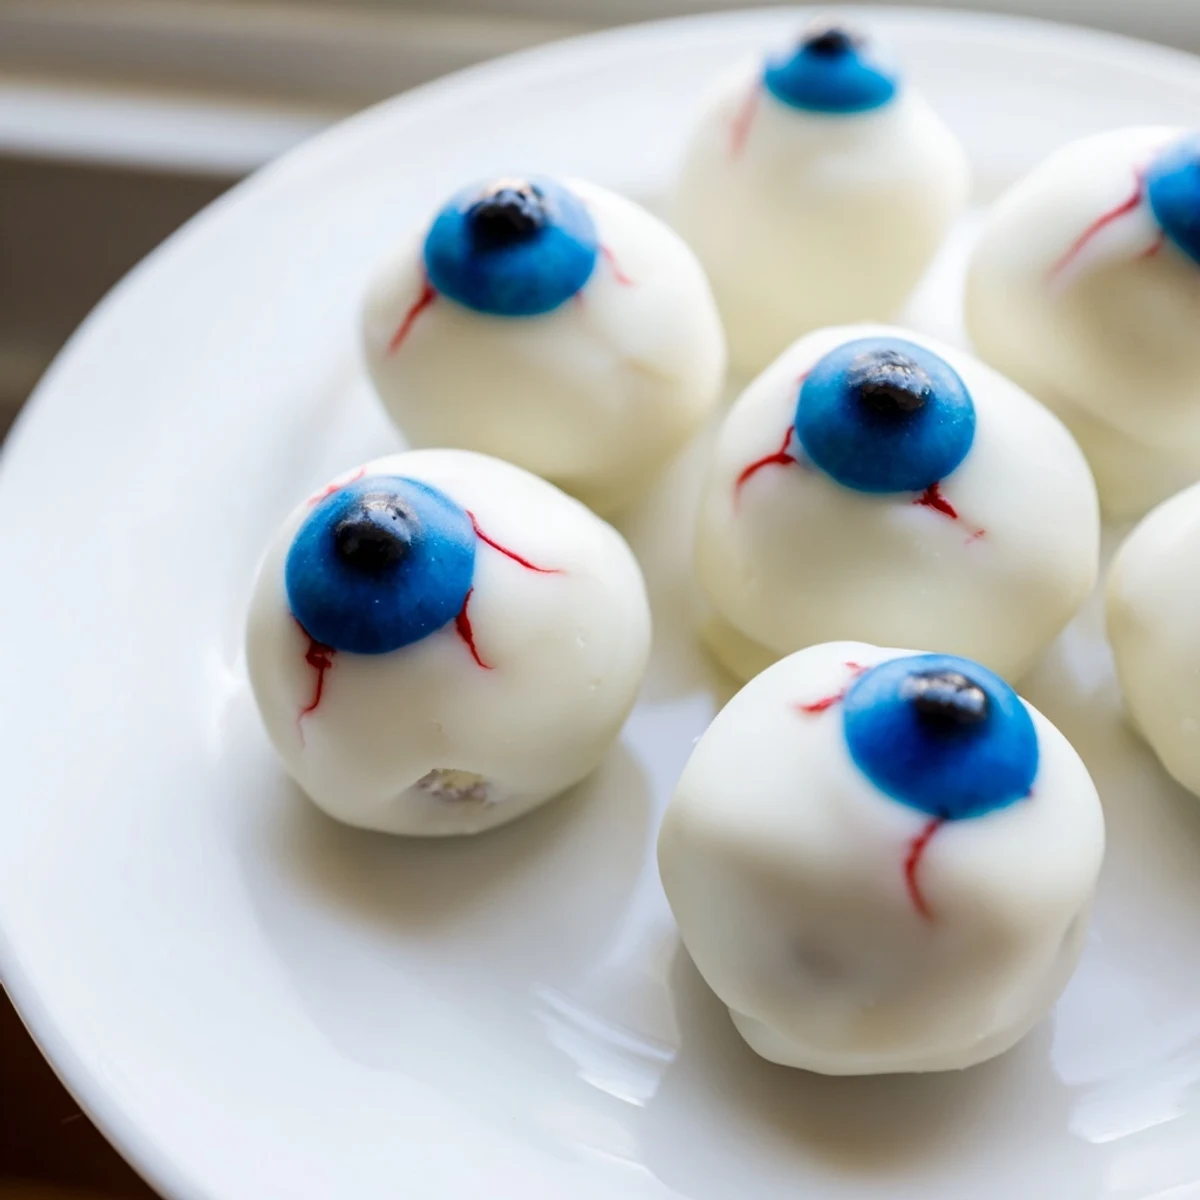
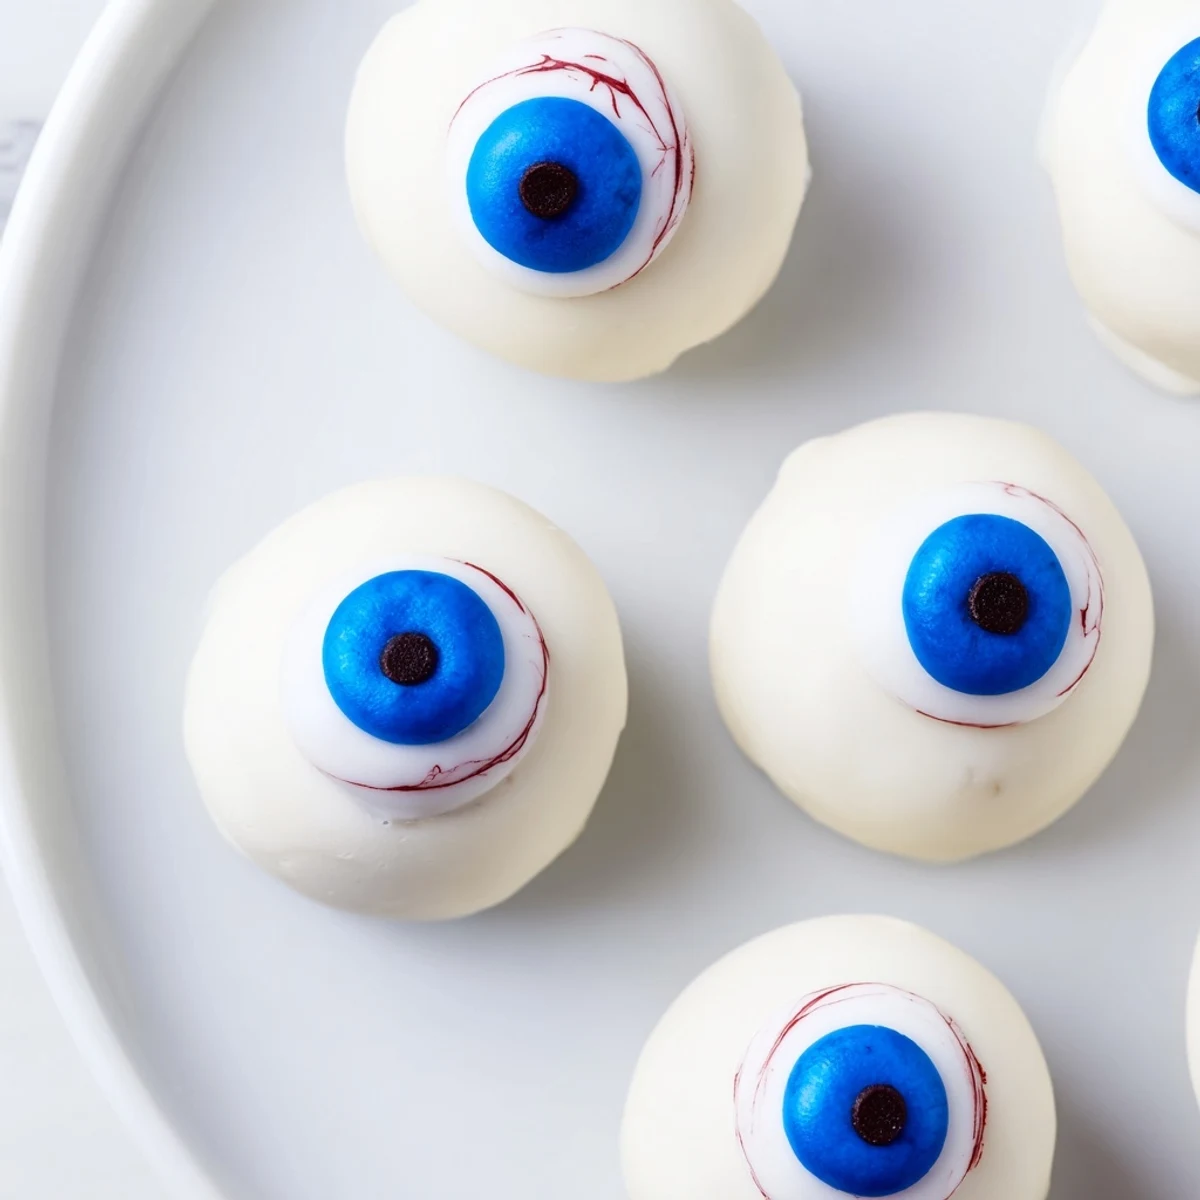
Save These Halloween-themed cake balls combine crumbled vanilla cake with cream cheese frosting, shaped into rounds and coated in white chocolate. The eyeball design uses colored candy melts for irises and dark chocolate for pupils, finished with red gel veins for a spooky effect. Each moist, chocolatey bite delivers a perfect balance of sweet cake and creamy filling.
The year my daughter decided she wanted a spooky Halloween party instead of the usual cute pumpkin decorating, I knew I had to step up my game. I stumbled across the idea for cake eyeballs somewhere online at midnight, surrounded by sticky notes and half-formed plans. We made them together on a rainy Saturday afternoon, kitchen covered in chocolate splatters and powdered sugar dust. Her friends actually squealed when they saw the platter, which I consider the highest possible compliment.
I remember bringing these to my office potluck one year and watching my normally reserved coworker slowly rotate one between her fingers, fascinated and slightly horrified. Someone asked if they were supposed to be that realistic, and I took it as a massive win. Now they are requested every October without fail.
Ingredients
- Vanilla cake mix or homemade cake: The foundation needs to be completely cool before crumbling, or you will end up with a sticky mess instead of perfect eyeballs
- Cream cheese and butter: Room temperature is non-negotiable here, or your frosting will turn lumpy and refuse to blend smoothly
- Powdered sugar: Sift it first if you have the patience, though I have skipped this step in a time crunch without disastrous results
- White chocolate or candy melts: These melt more smoothly than regular white chocolate and give you that perfect glossy finish
- Dark chocolate and colored melts: You can get creative here, but a good contrast between the iris and pupil makes all the difference
- Red gel food coloring: The gel version works better than liquid for drawing those creepy little veins
Instructions
- Bake and cool your cake completely:
- Patience here pays off, warm cake will turn into a gummy disaster when you try to mix it with frosting
- Crumble the cake into fine crumbs:
- Use your hands to break everything down until no large chunks remain
- Prepare the creamy frosting:
- Beat the cream cheese, butter, powdered sugar and vanilla until you have something silky and smooth
- Combine cake and frosting:
- Mix until the mixture holds together when you press it, adding more frosting if it feels too dry
- Shape into eyeballs:
- Roll tablespoons of mixture into smooth balls and freeze them for 20 minutes so they hold their shape during dipping
- Coat with white chocolate:
- Melt the white chocolate gently, dip each ball completely and let the excess drip off before placing on parchment
- Add the colored iris:
- Work quickly while the coating is still soft to attach your blue or green centers
- Create the pupil:
- A tiny dot of dark chocolate in the center brings these eyeballs to life
- Draw spooky veins:
- Use red gel to create jagged lines radiating outward for that wonderfully creepy effect
- Let everything set completely:
- Give them at least an hour to firm up before serving or they will smudge when handled
 Save
Save These became a tradition in our house after that first successful party. Now the anticipation starts building weeks before Halloween, with requests for specific eye colors and extra bloodshot details.
Making Ahead
I learned the hard way that these are best made the day before your event. Store them in the refrigerator in an airtight container and they will hold up beautifully for 48 hours.
Flavor Variations
Chocolate cake works just as well if you want something darker and richer. You can also add a teaspoon of instant espresso powder to the white coating for a mocha twist.
Serving Suggestions
Arrange these on a dark platter for maximum impact. I have served them resting on a bed of crushed chocolate cookies that look like dirt.
- Stick them in a pumpkin like a creepy centerpiece
- Pair with blackberry punch for a complete spooky spread
- Label them clearly so guests know they are sweet treats
 Save
Save There is something deeply satisfying about serving food that makes people gasp before they laugh. Hope these become a spooky tradition in your kitchen too.
Common Questions
- → How far in advance can I make these?
-
Prepare the cake balls up to 2 days ahead. Store in an airtight container in the refrigerator. Add the red gel veins on the day of serving for the freshest appearance.
- → Can I use cake from scratch instead of boxed mix?
-
Absolutely. Homemade vanilla cake works beautifully. Just ensure it's completely cooled before crumbling, as warm cake will make the mixture too soft to shape properly.
- → What's the best way to melt the chocolate coating?
-
Melt white chocolate in 30-second intervals in the microwave, stirring between each. Add a teaspoon of vegetable oil if it seems too thick for smooth dipping. Work quickly once melted.
- → How do I prevent the cake balls from falling off the stick?
-
Dip the tip of each stick in melted chocolate before inserting into the chilled ball. The chocolate acts as glue. Let set for 5 minutes before dipping the entire ball.
- → Can I freeze these for later?
-
Yes, freeze undecorated cake balls for up to 1 month. Thaw in refrigerator overnight, then bring to room temperature before coating with chocolate and decorating.
- → What other flavors work well?
-
Chocolate cake with orange frosting creates a fun twist. Red velvet cake pairs beautifully with cream cheese filling. Lemon cake offers a bright contrast to the rich chocolate coating.